Changing the language on your computer can be a game-changer, especially if you’re bilingual or want to learn a new language. In this comprehensive guide, we’ll walk you through the steps to change the language on your PC, whether you’re using Windows, macOS, or Linux. Each operating system has its unique method, so let’s dive into the details!
1. Changing Language on Windows
Method 1: Using Settings
Step 1: Access the Control Panel
Accessing the Control Panel is the first step in changing the language on Windows. The Control Panel is a central hub for configuring various system settings. To open it, click on the “Start” button, typically located in the bottom-left corner of your screen. Then, in the search bar, type “Control Panel” and hit Enter. This will bring up the Control Panel window.
Step 2: Open Clock, Language, and Region
Once you’re in the Control Panel, you’ll notice various categories. Look for the one called “Clock, Language, and Region” and click on it. This category houses settings related to time, date, and language.
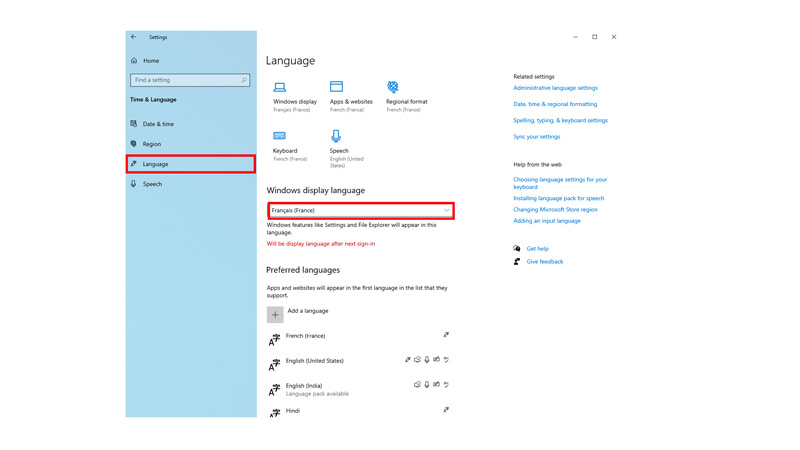
Step 3: Change Display Language
Within the “Clock, Language, and Region” category, you’ll see an option labeled “Change display language.” Click on this option to access the Language settings.
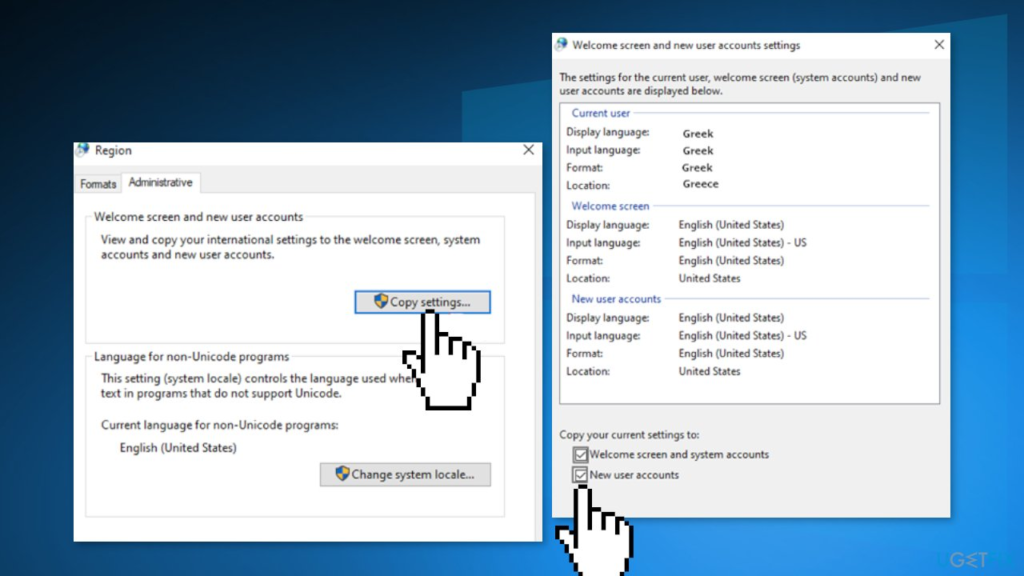
Step 4: Set New Language as Default
In the Language settings, you can add new languages to your system. Click on the “Install/uninstall languages” button to add a new language. Once added, go back to the “Region” window and select your newly added language. Then, click “Set as default” to make it the primary language for your user account.

Method 2: Using Windows PowerShell
Step 1: Open PowerShell as Administrator
Windows PowerShell is a powerful command-line tool that allows you to manage system settings. To open it as an administrator, right-click on the Start button and choose “Windows PowerShell (Admin)” from the menu.
Step 2: List Installed Languages
To manage languages using PowerShell, you can start by listing the currently installed languages. Enter the command `Get-WinUserLanguageList` and press Enter. This will display a list of languages currently available on your system.
Step 3: Add a Language
To add a new language, use the `Add-WinUserLanguageList` command followed by the language tag. For example, to add English (United States), you would use `Add-WinUserLanguageList -Language “en-US”`. After adding the language, set it as the display language using `Set-WinUILanguageOverride “en-US”`.
Step 4: Change System Display Language
Finally, to set the new language as the system display language, use the command `Set-WinUserLanguageList “en-US”` (or your chosen language) and then restart your computer for the changes to take effect.


2. Changing Language on macOS
Method 1: Using System Preferences
Step 1: Open System Preferences
System Preferences is your gateway to configuring various settings on macOS. You can access it by clicking on the Apple menu in the top-left corner of your screen and selecting “System Preferences.”
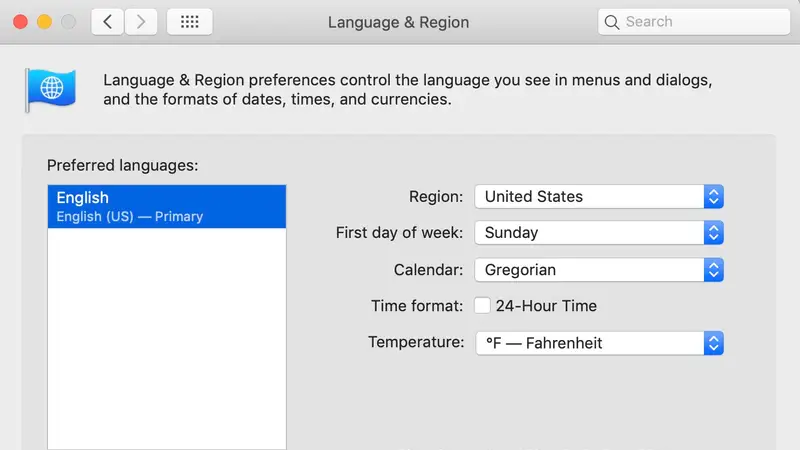
Step 2: Access Language & Region
Within System Preferences, you’ll find an icon labeled “Language & Region.” Click on this icon to access language-related settings.
Step 3: Add a Preferred Language
To add a new language, click the “+” button in the bottom left. A list of available languages will appear. Select your preferred language and click “Add.” Once added, you can set it as the primary language by dragging it to the top of the list and clicking “Use [Language]” when prompted.
Step 4: Reorder Language Preferences
You can also reorder your language preferences by dragging them up or down in the list. The top language will be your primary language.

Method 2: Using Terminal
Step 1: Open Terminal
The terminal is macOS’s command-line interface. You can find it in the Utilities folder within the Applications folder. It allows you to interact with your system on a deeper level.
Step 2: View Current Language Settings
To check your current language settings, enter the command `defaults read -g AppleLanguages` in Terminal and press Enter. This command will display a list of languages currently set on your system.
Step 3: Change the Preferred Language
To change the preferred language, use the command `defaults write -g AppleLanguages “(LanguageCode)”`, replacing “(LanguageCode)” with the code for your desired language. For example, to set your preferred language to Spanish, you would use `defaults write -g AppleLanguages “es”`. After making this change, restart your Mac to apply the new language settings.


3. Changing Language on Linux
Method 1: Using System Settings
Step 1: Open System Settings
The process of changing language settings can vary slightly depending on your Linux distribution, but in most cases, you’ll find system settings in the Applications menu or as an icon in the system tray.
Step 2: Navigate to Language Support
Once in the system settings, look for a category labeled “Language Support.” This is where you can manage language settings.
Step 3: Add New Language
In the Language Support settings, you can add new languages. Typically, you’ll see a list of available languages, and you can search for and select your desired language. After selecting it, click “Apply Changes” to add it to your system.
Step 4: Set Language Priority
In many Linux distributions, you can set language priorities to determine the order in which languages are used. This is particularly useful if you’re multilingual. Go to the “Regional Formats” tab and choose your preferred regional format, and then click “Apply System-Wide” to save your changes.


Method 2: Using the Command Line
Step 1: Open Terminal
To use the command line to change language settings, you’ll need to open the Terminal application. This can typically be found in the Applications menu or by searching for “Terminal.”
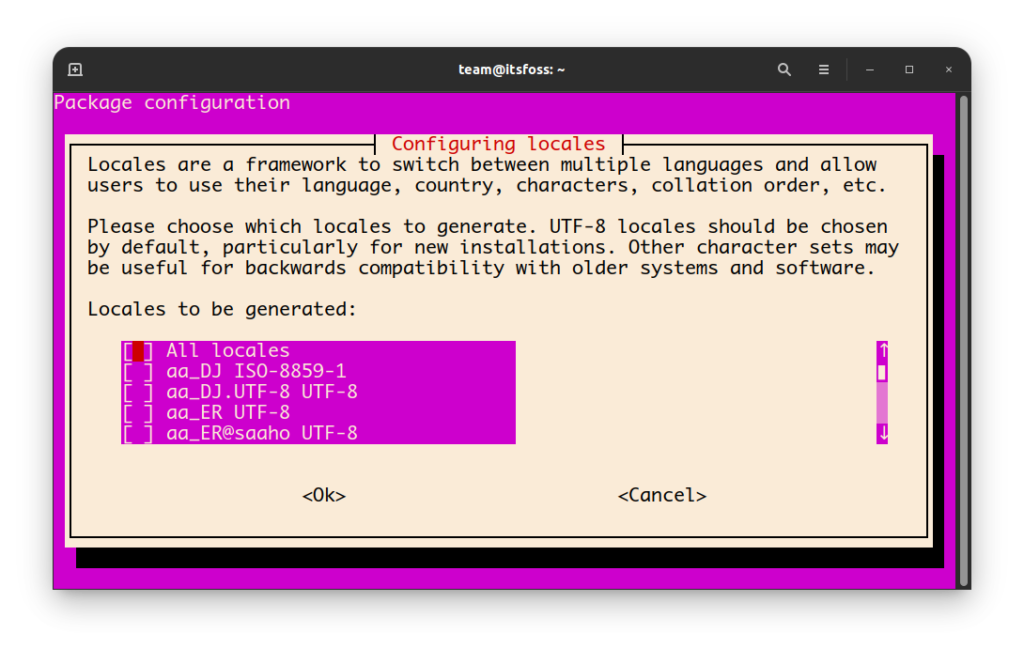
Step 2: List Available Locales
Before making any changes, you can list the available locales on your system using the `locale -a` command. This will display a list of locale codes that represent various languages and regions.
Step 3: Change the Locale
To change the locale to your desired language, use a command like `sudo update-locale LANG=”en_US.UTF-8″`, replacing `”en_US.UTF-8″` with the locale code for your preferred language. After running this command, your system will use the new language settings. Remember to restart your system for the changes to take effect.

4. Common Troubleshooting
When changing the language on your PC, you may encounter common issues such as missing language packs or unexpected behavior. Here are some troubleshooting tips:
– Missing Language Packs: If your desired language is not available, you might need to download and install additional language packs. Check your system settings or official documentation for instructions on obtaining language packs.
– System Restart: Changes to the system language often require a restart to take effect fully. If you don’t see the expected language changes immediately, try restarting your computer.
– Language Display Issues: Occasionally, you may encounter display issues in specific applications when changing the system language. These issues are usually related to application support for multiple languages rather than the language change process itself. In such cases, check the application’s language settings or seek support from the application’s developers or user community.
– Permissions and Administrative Rights: Ensure you have the necessary administrative rights and permissions to make system-wide language changes. Some changes may require elevated privileges.